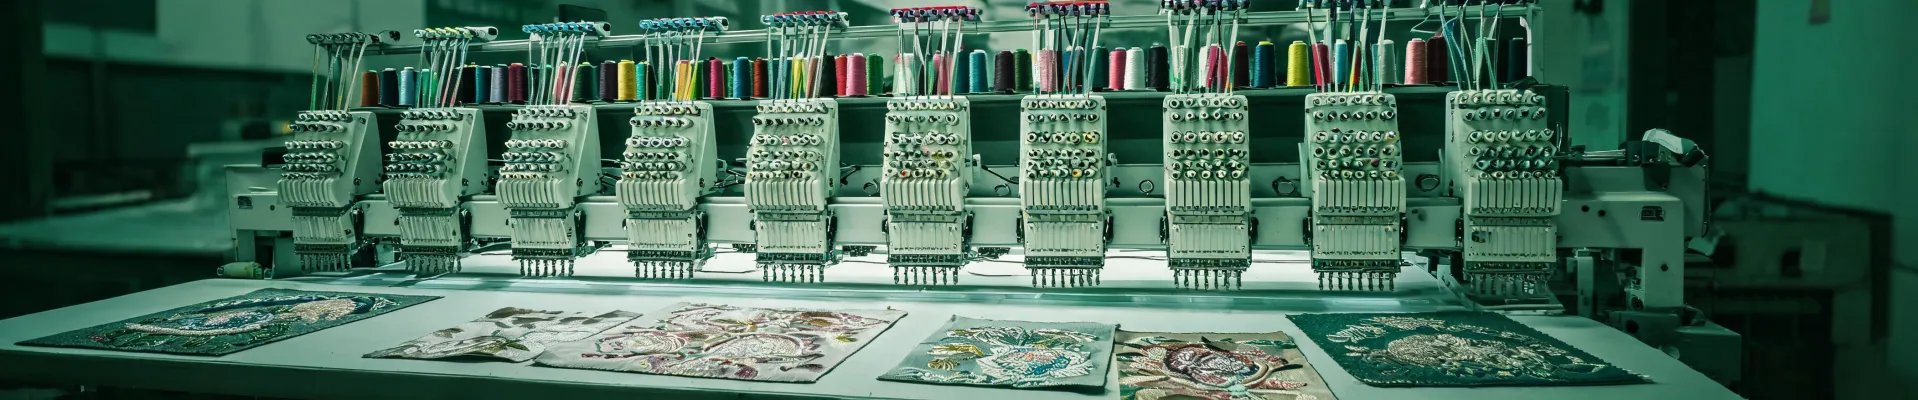
Barudan Single Head Embroidery Machine: My 6-Step Setup Checklist (After $12,000 in Mistakes)
Posted on 2026-08-03 by Elise Marceau
I've been running Barudan embroidery machines since March 2017. Started with a single head, added a 6-head in 2021. In the first three years, I made roughly $12,000 in preventable mistakes. Every single one traceable to a skipped setup step.
This checklist came out of those failures. I use it before every production run now. If you own a Barudan single head embroidery machine — or you're about to buy one — it'll save you the tuition I paid.
Six steps. Twenty minutes. No theory, just checks.
Who This Is For
Took me about 150 orders to understand that the machine is rarely the problem. The setup is. Hoop tension, lubrication, thread selection — that's where failures live.
If you're coming from a comfort sewing machine (a home Brother or Singer, say) to a Barudan single head, you're especially at risk. Home machines are forgiving. Industrial machines tell you immediately when something's wrong — usually by breaking thread or distorting fabric. That's the machine being honest with you.
Step 1: Pick the Right Hoop
Barudan uses spring-loaded hoops, not the screw-tension kind. They also make magnetic hoops and cap frames. Which one you choose matters more than people think.
My 2019 mistake: I bought off-brand hoops to save money. Three knockoff frames at $28 each versus the $60-ish price of genuine Barudan embroidery machine hoops. They looked identical. Then I ran a $3,200 corporate polo order, and the knockoff frames let the fabric shift mid-stitch. Eighteen shirts with misaligned logos. $540 in reprint costs, a one-week delay, and a client who never fully trusted me again.
I still have one of those hoops. Paperweight. Reminder.
Checklist:
- Hoop size gives at least 1 inch of clearance on all sides of the design
- No warped or bent frame edges — inspect before mounting
- Genuine Barudan hoops preferred; if third-party, run a test stitch-out first
- Magnetic hoops for caps and thick materials
Barudan single head machines commonly use 12" x 12" and 8" x 12" hoops. Cap frames are separate. Pricing as of January 2025: roughly $45 to $120 for genuine hoops depending on size (dealer pricing varies; verify current prices at barudan.com).
Step 2: Hoop the Fabric Correctly
This sounds basic, but it's the #1 cause of registration problems. Not the machine. Hooping technique.
The fabric needs to be taut, not tight. Overstretch and the fabric rebounds after being needled, causing puckering. Under-tension and the design shifts or overlaps.
The mental image: the fabric should feel like a drumhead. Tap it lightly. If it ripples, it's loose. If it distorts when you press, it's too tight.
What changed my hooping approach was September 2022. I had a 40-piece order for a local boutique. The owner watched me hoop and said, "You're going to stretch that." I'd been embroidering for five years, so I nodded politely and didn't change anything. She was right. The first piece came out with visible fabric distortion around the logo. We re-hooped all 40 with lighter tension. Night and day.
A customer with zero embroidery experience taught me what the manual meant by "avoid excessive tension."
Checklist:
- Pattern area centered using hoop center markings
- Fabric grain straight — you won't notice if you mess this up until it's too late
- Consistent tension all around the frame
- No ripples anywhere in the hoop
Step 3: Lubricate on Hours, Not Feelings
The most expensive mistake in my history came from skipping a lubrication cycle. June 2023. I had a rush order for a wedding dress shop, and the 6-head machine was jamming constantly. The single head had gone about 180 hours since its last lube. Per the Barudan service manual, lubrication is recommended every 100 hours of operation as a general rule — and the hook assembly needs attention sooner, roughly every 40–50 hours.
I knew this. I skipped it anyway.
The rotary hook assembly seized mid-run. $460 for the repair, four days of downtime, and the wedding dress order had to be moved to the 6-head (which, honestly, I should have done from the start). Total cost of skipping a 15-minute task: roughly $1,240 in repairs and lost production. The bride almost didn't get her dress in time.
The worst part? It wasn't the first time I'd skimped on maintenance. It was just the first time it bit me hard enough to remember.
The Right Lubricant for Sewing Machine Longevity
Use a white mineral oil made for industrial sewing machines — the one listed in your Barudan manual, or an equivalent like Juki-brand oil. Do not use WD-40 or household oil on the rotary hook. Those leave residues that bake into varnish over time and cause exactly the seizure I experienced.
Checklist:
- Wipe the hook race area clean first — dust plus oil becomes grinding paste
- Add one drop of oil at the rotary hook contact point
- Lubricate the needle bar mechanism every 50 hours or weekly
- Mark lubrication dates in a log or on a sticky tab
- Do it at the start of the day, not when the machine starts squeaking
Step 4: Use the Machine Embroidery Thread Chart
Thread selection is where budget thinking hurts the most. The machine embroidery thread chart is not decorative. Treat it as a starting point, not a rulebook — tension is a triangle of needle thread, bobbin thread, and fabric. Change one variable and everything shifts.
Standard thread weights for reference:
- 40wt — standard for most machine embroidery
- 60wt — small lettering and fine details
- 30wt — caps, towels, thicker fabrics (use a larger needle)
- Bobbin thread — 60wt trilobal polyester is a solid default
If you're coming from a comfort sewing machine, this is a hard adjustment. Home machines often run 40wt with factory-set tension. Barudan single head machines need deliberate tension setup — but they reward you with noticeably better stitch quality once you dial it in.
First-year mistake: buying whatever thread was on sale. I ran some cheap polyester with inconsistent thickness, and the needle broke every few hundred stitches. I blamed the needle. Then the machine. Then the design file. It was the thread. Quality perception isn't abstract — a client who sees poor lettering doesn't think "that shop has a tension issue." They think "that shop does bad work." The $10 you save on a cone of thread can cost you the client.
What I use now: Madeira, Symthread, or an equivalent brand with consistent thickness. And I write down the tension settings for each thread/fabric combination. Also worth noting: the hoop itself changes tension behavior. Genuine Barudan hoops hold fabric uniformly; the wobbly off-brands don't. For a while I thought my thread tension was drifting. It was the hoop. Isolate one variable at a time.
Checklist:
- Choose thread weight based on design size and fabric type (keep a thread chart visible near the machine)
- Use consistent, quality thread brands
- Test the exact thread + fabric + backing combination on a scrap first
- Record tension settings for each setup
Step 5: Test Stitch Before Production
I can't make you do this. I can only tell you what happens when you don't.
Q1 2024. A client needed 500 corporate hoodies in six days. The order was a 6-head job, not a single head job, but the setup principles are identical. The client mentioned — almost casually — that the fabric was thicker than originally discussed. I didn't run a test stitch. Time pressure. The 6-head was booked, the client was waiting, and I chose to trust my assumptions.
Wrong choice.
The sample came back with thread breaks. The client rejected it, and we re-did the sample with a larger needle and corrected tension. Two days lost, plus a credibility hit that's hard to quantify but impossible to ignore.
Calculated the worst case afterward: 15 minutes wasted if the test passed. The best case wasn't even a benefit — it was just not being embarrassed. In hindsight, I should have pushed back on the timeline and run the test. But the pressure was real, and I made the call with incomplete information. Lesson learned: the test stitch is the cheapest insurance you'll ever buy.
Checklist:
- Run a test on the same fabric, backing, and thread combination
- Check stitch quality: tension loops, skipped stitches, thread breaks
- Verify needle size is appropriate for the fabric thickness
- Keep the test stitch-out until the production run is complete
Step 6: Document the Setup
The step almost nobody does, and the one that saves the most time over a year: keep a setup log.
Since January 2024, I've kept a spiral notebook and a tablet spreadsheet next to the machine. Each entry includes date, hoop type, thread brand and color number, needle size, tension settings, and notes about the fabric. When a job runs perfectly, the entry becomes the template for future similar work.
We've caught 47 potential production issues using this log in the past 14 months. Patterns emerge quickly: "This exact setup produced a different result last time" is a red flag that something changed — usually the hoop or the thread batch.
It took me six years to understand that process discipline prevents more failures than any amount of technical skill. A single head machine, properly documented, is more reliable than a 6-head machine run by guesswork. That's not an exaggeration.
Common Mistakes I've Made (So You Don't Have To)
A few more things that bit me over the years:
Wrong bobbin size. If the bobbin is too small for the chamber, tension drops mid-run and you get loose stitches that look like a tension problem. Check bobbin diameter against the machine specification. It's a 30-second check that saves a lot of frustration.
Using a hoop from a different head configuration. Barudan hoops are model-specific. A 6-head hoop will not seat the same in a single head frame. The clamping force differs, and the fabric shifts. When in doubt, ask your dealer (or consult the compatibility list at barudan.com). This is a common issue and nobody talks about it.
Ignoring the needle plate size. Using a 75/11 needle in a plate designed for 90/14 causes skipped stitches and, over time, plate damage. Match needle to plate. Always.
Assuming the thread chart is gospel. It's a reference, not a law. Use it as your baseline, then adjust for fabric, backing, and hoop behavior.
Final Word
Your Barudan single head embroidery machine is capable of exceptional stitch quality. But it depends on the quiet stuff: a hoop that holds, oil that's fresh, tension that's correct, a test that's been run. Do the quiet stuff.
If you take nothing else from this, take this: the expensive mistake is almost never the one you planned for. It's the 15-minute task you skipped because you were busy. The machine didn't fail. The setup failed. And the fix is usually cheap, fast, and completely within your control.
So glad I finally wrote this down — it forced me to reread my own lesson list. Now it's yours.

Elise Marceau
Elise Marceau is an LED display and digital-signage systems analyst covering LED video walls, modular screens, transparent LED, control processors, and indoor or outdoor signage. She applies IEC 62368-1 safety principles while comparing pixel pitch, luminance, contrast, refresh rate, colour uniformity, viewing angle, ingress protection, power density, module serviceability, and signal redundancy. Her specification guides help integrators, venue operators, retailers, and procurement teams align viewing distance, ambient light, content format, installation access, electrical load, and lifecycle support.