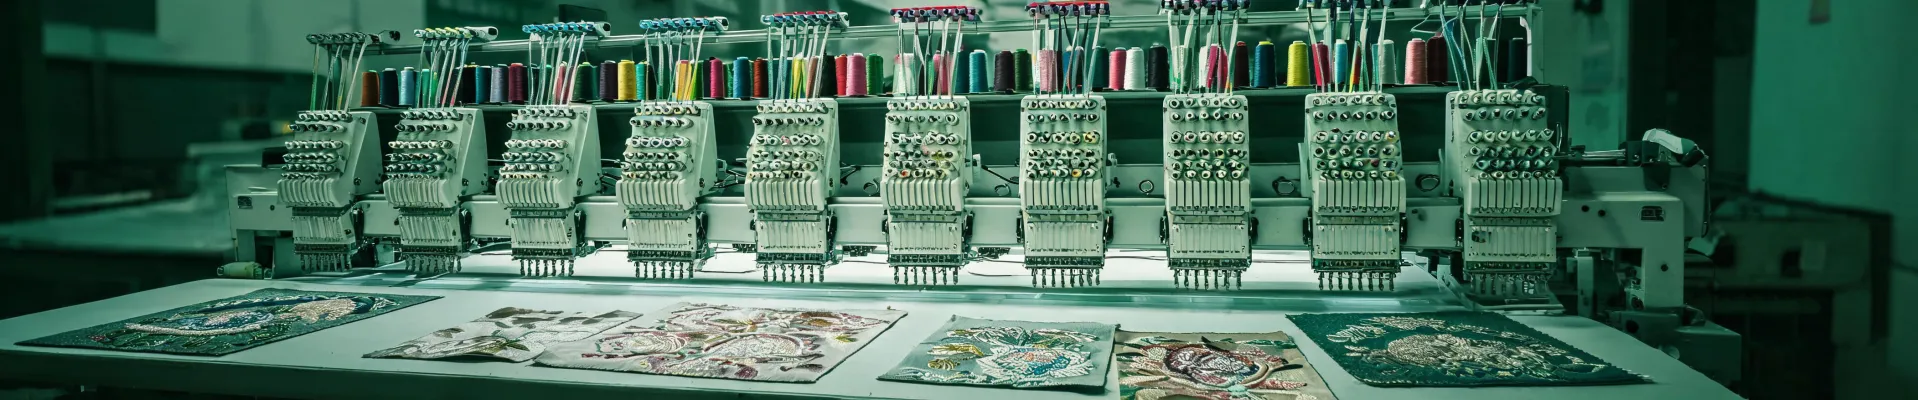
Emergency Checklist: Preparing a Barudan 8-Head Embroidery Machine for a Rush Order
Posted on 2026-09-24 by Adrian Okafor
-
Who this checklist is for
-
Step 1: Confirm the real specs before you touch the machine
-
Step 2: Triage the Barudan 8-head machine, not just the schedule
-
Step 3: Match Barudan embroidery hoops to the job before you load
-
Step 4: Prepare the file and proof like the deadline depends on it
-
Step 5: Run a physical first-article test on the actual garment
-
Step 6: Schedule by heads, not by total pieces
-
Step 7: Build a delivery buffer and a handoff protocol
-
Common mistakes that cause missed rush deadlines
-
Checklist summary
Who this checklist is for
I coordinate emergency production at an industrial embroidery shop. I have handled 120+ rush orders in nine years, including same-day turnarounds for apparel brands and event merchandisers. If you run a Barudan 8-head embroidery machine and a deadline just moved up, this checklist is for you. Seven steps. No theory. The goal is not to look busy. The goal is to get correct goods out the door before the client notices the clock.
In March 2024, a client called at 6:40 p.m. needing 240 embroidered fleece jackets for a trade show 36 hours later. Normal turnaround was five business days. We had one Barudan 8-head machine, two operators, and an empty night shift. The upside was a $12,000 order. The risk was missing the show setup and eating a $2,500 penalty clause. I kept asking myself: is $12,000 worth potentially losing the client? We said yes, but only after triaging every head like it was a separate machine.
Step 1: Confirm the real specs before you touch the machine
Get the garment type, placement, stitch count, thread colors, backing, and the actual in-hands time. Not the ship-by time. The time the client needs it. Write it down. A rush order with unclear specs is not a rush order; it is a future redo.
What I mean is that the 'rush' part is rarely just about speed—it is about locking the variables so nobody discovers a problem at 2 a.m. Confirm whether the logo is left chest, full back, sleeve, or cap. Confirm if the garments are already in-house or arriving late. Confirm who approves the proof and how fast they respond. If approval takes six hours, your production window is six hours shorter.
Step 2: Triage the Barudan 8-head machine, not just the schedule
Check each head: needles, tensions, rotary hooks, trimmers, presser feet, and lubricant. Run a small test on scrap with the actual thread. Barudan's published product range covers 1-12 heads, so an 8-head machine is a mid-capacity commercial workhorse. That matters for parts and service support, but it does not make it immune to a bent needle.
During that March 2024 job, head six had a bent needle and a slightly rough trim. We could have run seven heads and pushed the schedule. The numbers said seven heads would still finish on time. My gut said fix it. We stopped for 18 minutes, replaced the needle, and reset the trimmer. Later, the operator said head six had been catching thread on the previous job too. Never expected the bottleneck to be a $3 needle. Turns out the expensive risk was not the needle; it was the redo.
Step 3: Match Barudan embroidery hoops to the job before you load
This is the step most shops rush. They grab the nearest hoop, clamp the garment, and hope. Barudan embroidery hoops are not universal. You need the right hoop for the machine arm, the garment thickness, and the embroidery field. Magnetic hoops can save time, but verify clearance under the presser feet and across all eight heads. A hoop that works on a single-head sample machine may not clear an 8-head production bridge.
Check hoop tension, fabric flagging, and backing. For fleece, use a cut-away backing and avoid over-stretching. For caps, use the proper cap frame and driver. The surprise isn't usually the hoop size. It is how much time you lose when one hoop setup fails on head three and the whole machine stops.
Step 4: Prepare the file and proof like the deadline depends on it
Review the digitized file for color sequence, trims, underlay, and pull compensation. Then run a stitch-out. Use a single-head or sample machine for this, not the 8-head production line. If someone suggests using a Radiance embroidery machine or a 7256 Fashion Mate 70-stitch computerized sewing machine to run part of the order, treat that as a sample or repair station, not production capacity. An Elecktrick sewing machine—yes, that common misspelling for electric—is for repairs and small fixes. Do not confuse home or entry-level equipment with a commercial run of 240 pieces.
Three things: file approved. Thread loaded. Backing cut. In that order. If the proof is not approved, do not hoop a single garment. The efficiency gain from starting early disappears if you have to unpick or redo.
Step 5: Run a physical first-article test on the actual garment
Not scrap. Not a similar shirt. The actual garment, with the actual backing, actual thread, and actual placement. Check registration, density, puckering, color, and trims. The numbers said we could skip the first-article test on the March job and save 35 minutes. My gut said run it. We ran it. The left-chest density was off by about 8%—enough to look muddy on navy fleece. We fixed the file before 240 pieces became 240 problems.
Calculated the worst case: a complete redo at $3,500 in materials and labor. Best case: save 35 minutes. The expected value said skip it. The downside felt catastrophic. We tested.
Step 6: Schedule by heads, not by total pieces
Do not divide total pieces by total hours and call it a plan. Calculate stitch count per piece, then per head. Account for thread changes, hooping, re-hooping, and trimming. A rough formula: total stitches ÷ (number of heads × effective stitches per minute) + setup time. Then add a buffer. For rush work, use 20-30% longer than the machine's best-case estimate. The machine is fast; the human hooping station is often the real bottleneck.
On another rush job, we discovered the 8-head Barudan could stitch faster than we could hoop. We added a second hooping table and cut 50 minutes from the run. There is something satisfying about finding the real constraint. After all the stress, seeing the last box leave with time on the clock—that is the payoff.
Step 7: Build a delivery buffer and a handoff protocol
Promise the worst-case time, not the best-case time. Assign a QC checker who did not run the machine. Pack by order, not by pile. Label boxes with the client's deadline. Have a backup plan: who do you call if a head goes down, if the thread arrives wrong, or if the client changes the logo at 11 p.m.?
The best part of a systematized rush process is not speed. It is certainty. No more 3 a.m. worry sessions about whether the order will arrive. The client gets a realistic time, you get a buffer, and the shop does not have to choose between quality and the deadline.
Common mistakes that cause missed rush deadlines
- Trusting a used Barudan listing without checking head-specific wear. Used 8-head commercial embroidery machines often list from $8,000 to $35,000 depending on age, heads, and condition (based on major used-equipment marketplace listings, early 2025; verify current pricing).
- Assuming any hoop works. Barudan embroidery hoops vary by machine arm, garment type, and magnetic vs standard.
- Using a Radiance embroidery machine or a 7256 Fashion Mate 70-stitch computerized sewing machine as if it were an 8-head production machine.
- Skipping the first-article test because the file looks fine on screen.
- No written buffer. The deadline is when the client needs it, not when you expect to finish.
Checklist summary
- Confirm specs and the real in-hands deadline.
- Triage the Barudan 8-head machine head by head.
- Match Barudan embroidery hoops and backing to the garment.
- Proof the file; use small machines only for samples.
- Run a first-article test on actual goods.
- Schedule by heads and stitch count, then add buffer.
- Build a handoff and backup plan.
Pricing is for general reference only; verify current rates and machine condition. Machine range details should be checked against Barudan's current published documentation. No machine guarantees 100% uptime, which is exactly why the buffer and backup plan matter.

Adrian Okafor
Adrian Okafor is a professional audio systems analyst specializing in loudspeakers, PA speakers, subwoofers, line arrays, stage monitors, power amplifiers, and audio mixers. He uses IEC 60268-5 measurement methods for applicable passive loudspeakers while comparing frequency response, sensitivity, maximum SPL, nominal impedance, dispersion, crossover behavior, amplifier headroom, limiter settings, and rigging loads. His system guides help sound designers, rental companies, venues, and installers match acoustic coverage, audience capacity, deployment geometry, power distribution, monitoring needs, and safe operating margins.